OpenMusic Tutorials
Prev| Chapter 11. The Maquette| Next
Tutorial 32: Introduction to the Maquette I
Topics
The Maquette and Temporalbox objects. The difference between red and blue patches.
Key Modules Used
Maquette, Temporalbox, red and blue patches.
The Concept:
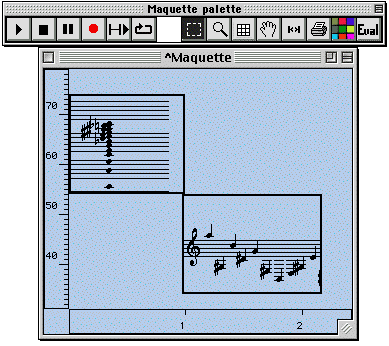
The Maquette is a special container object which incorporates a time element. A Maquette can contain any musical object, but can also contain a special object called Temporalbox. These boxes can contain other patches and Maquettes. A Maquette looks like this:
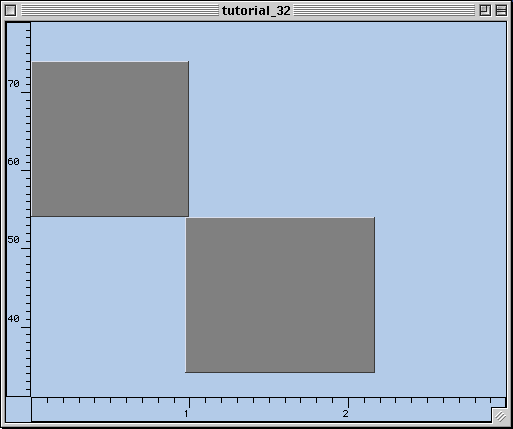
You’ll notice the axes are numbered. The x-axis is a time dimension, labelled in seconds. The y-axis is an arbitrary value which can be used to control the Temporalbox objects in various ways. The other objects themselves, including the Temporalboxes are the colored boxes in the field, which can be stretched and moved around at will in all directions. Playable OM objects can be dropped directly into a Maquette, and are edited with their graphic editors as usual. Temporal box objects are created when a patch is dropped into a Maquette. They look like this when opened:
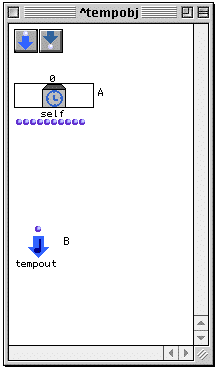
Looks like a patch, right? Except for the _self_ object and the tempout
object, of course.
The basic idea of a Maquette is this: objects in
the Maquette are placed in time, along the
x-axis, and are played in that order. If they are a
Temporalbox object, whatever is connected to the
tempout output is played when the play pointer crosses the left edge of the
box in the Maquette. Here’s the cool thing: a
patch within a Temporalbox in a
Maquette has access to information about its
placement and shape within the frame of the
Maquette, and these quantities can thus be used
to change the way the patch behaves. This information comes into the
Temporalbox through the outputs of the _self_
object. In addition, you can create your own inputs and outputs between
Temporalboxes which can carry other data between them.
Consider the following Maquette, where two objects have been placed: a Chord, and a Temporalbox containing a Chord.

The first is a Chord. The second is a
Temporalbox, which has the same
Chord on the inside, attached to the tempout:
As they stand, both of these objects will behave the same way. Connecting the
Chord to tempout just means the Chord
gets played. The advantage to having the chord in the
Temporalbox is that we can use the data about the
box’s position and shape to modify the Chord, for example,
transposing it based on the height of the box in the frame.
OK, now lets see how this Maquette was created.
The Patch:
First, we create a Maquette by selecting File->New->New Maquette. Open it by double-clicking its icon.
Now, we drop the patches for Tutorial 8 and Tutorial 12 into the framce. Notice that when we drop patches, unlink musical objects, they are automatically put within a Temporalbox:
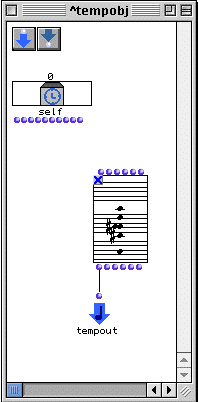
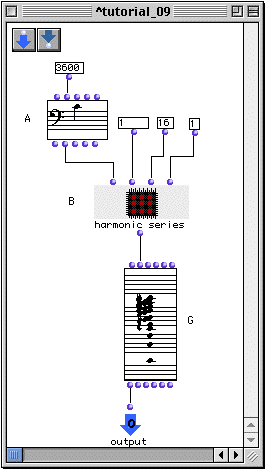
Now, we need to connect this patch to the tempout so that it will be
evaluated. The problem is that the patch has no outputs. The blue patch
represents a reference to the master copy of the patch in the Workspace.
Changes to this patch are made directly to the master. We don’t want to modify
the original master of Tutorial 9, so we need to make a copy, to make an
abstraction this patch. We do this by selecting the patch and hitting a.
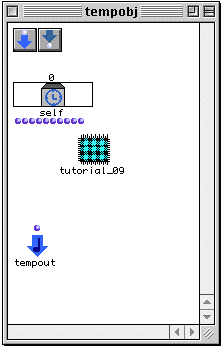
The patch is now abstracted. It is no longer connected with the master copy
and exists as its own separate entity. Now you can go in, add an output, and
connect it to the _self_ output of the Chord.
Then close it and connect the output to tempout.
Do the same thing with the other patch in the other Temporalbox.
Now you can position both boxes within the frame of the Maquette. The mini-visualization also functions here. Turn it on by selecting a Temporalbox and hitting m.
Once you’ve positioned them to your liking, you can play the Maquette buy clicking the play button, but before you do, you must evaluate the entire Maquette object by clicking Eval.
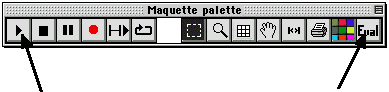
Notice that each time you evaluate the Maquette the objects change because of the random function in the second patch.
Prev| Home| Next
—|—|—
The Maquette| Up| Tutorial 33: Introduction to the
Maquette II