OpenMusic Tutorials
Prev| Chapter 15. The Maquette II| Next
Tutorial 40: More Advanced Maquettes and MIDI
Topics
Loading a Maquette with objects via its icon; saving Maquette output as a MIDI file.
Key Modules Used
Maquette, Voice, Chord-
seq, list, save-as-midi
The Concept:
The Maquette is the ideal object for arranging musical events and processes in time. Here we will examine a simple way of placing a range of objects such as other Maquettes, Chord-seqs and Voice objects in Maquettes. After that, we will save our musical sketch in the form of a Midifile.
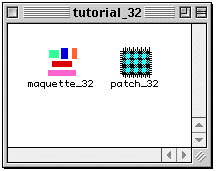
First, we create a new patch and a new Maquette:
Now we open the patch window and drag the Maquette into it. Whenever you drag a Maquette from the Workspace into a patch window, the following icon appears to represent it:
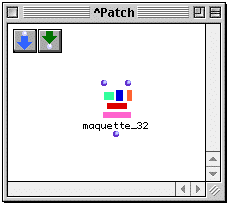
As is the case with patches, this icon is a reference to the original; any changes we make to it will be made directly to the original object. If we don’t want to change the original, we must abstract it in the same way as we do a patch, by selecting it and hitting a.
The first input is a list of onset times, in milliseconds. The onset times correspond to the elements of a list passed to the second input. (They have the same number of elements.) The elements of this list can be any playable object or another Maquette or patch (provided that you’ve configured these patches to play in a Maquette - see Tutorial 32). These objects are placed within the Maquette at the onset times specified at the first input.
In this patch we will take a series of objects created in previous tutorials and combine them in a Maquette. The first of these is a Voice object, at (A). We will use the rhythm of this Voice to trigger the entrances of the other objects in the Maquette.
The Patch:
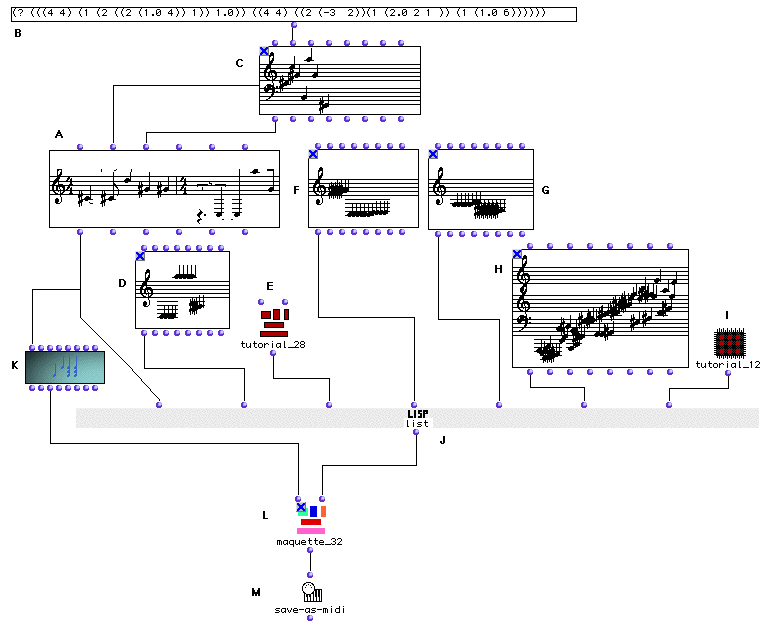
At (A) we will create a Voice facrtory and edit both the rhythm tree and the notes. We will use this Voice as a type of “cantus firmus” for our musical sequence, meaning that the other events (objects) that we place inside our Maquette will be syncronized, entering with the notes of the Voice.
We have decided to put seven events in the Maquette , including Voice (A) which will be the starting event. The rhythm tree (B)
(? (((4 4) (1 (2 ((2 (1.0 4)) 1)) 1.0)) ((4 4) ((2 (-3 2)) (1 (2.0 2 1)) (1 (1.0 6))))))
…will therefore have seven attacks.
The notes of this cantus firmus Voice are taken from a
Chord-seq connected to the third input, _chords_ of
the Voice factory.
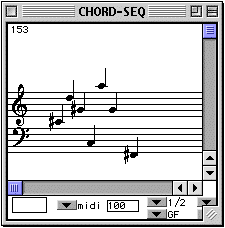
The combination of the two yields:

At (J) we use list to collect the seven objects that will be
placed in the Maquette.
The first object is our cantus firmus Voice.
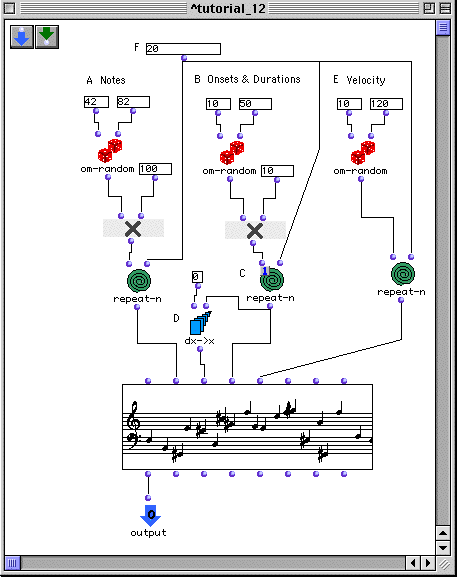
Objects (D), (F), and (G) are different random results of the patch demonstrated in Tutorial 12.
The Maquette at (E) is an abstraction (remember, we have to do this to preserve the original object) of the Maquette built in Tutorial 33. Remember how we ahave to evaluate a Maquette before playing it? Well, the same holds true for sub-patches and abstractions of Maquettes. You must open the abstraction and evaluate it before playing the master Maquette.
(H) is an interpolation between two chords, as computed in Tutorial 18.
(I) is an abstraction of the patch from Tutorial 13, modified so that the Chord-seq it generates is connected to an output (necessary so it can play through the Maquette.):
The onsets
In order to get our onsets in the form of a list in milliseconds, we will have
to connect our Voice object to a Chord-seq (K). Via their respective _self_ inputs and output. This is an
efficient way to transcribing traditional rhythmic notation into simple
numerical data. (This is done through inheritance. The
Chord-seq will inherit data from the
Voice object using appropriate
methods.).
At the first input of the Maquette (L) we connect a the list of onsets coming from the Chord-seq (K) . These onsets are the ‘temporal coordinates’ of each object of our list (J), which is connected to the second input of the Maquette (L).
Evaluating Maquettes
It’s important to remember that evaluating a Maquette’s icon is not the same as entering the Maquette itself and clicking the Eval button on the palette. The Eval button only causes items already within the Maquette to be evaluated. Connections made to the Maquette’s inputs in the patch window are not evaluated. In building this tutorial from scratch, for example, you must evaluate the Maquette icon in order to add the objects, then click the Eval button within the Maquette in order to evaluate the individual objects.
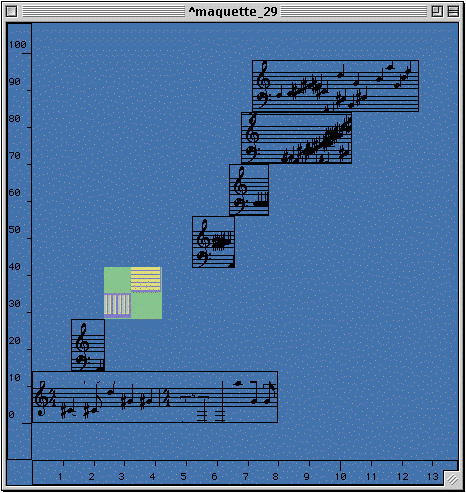
When we evaluate the Maquette, the objects are placed within it at the onsets given at the first input. They are arranged in a rising vertical order automatically for ease of viewing. Selecting them and turning on the mini-view with m gives something like this:
 | Contextual Menus in
**Maquette**s
| Contextual Menus in
**Maquette**s
—|—
|
If you changed the MIDI port settings for any of your objects, you may have to set the general Maquette MIDI output port withing the Maquette itself so that they all play back automatically.. This is done in a contextual menu brought up by ctrl -clicking in the Maquette window. This can also be accomplished with the right mouse button of a two-button mouse, if you have one installed. The contextual menu choice Midi Ports brings up a mini-dialog where you can change the master input and output ports for your Maquette.
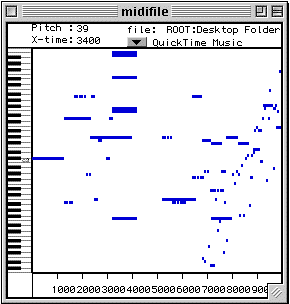
Lastly, the real-time output of any Maquette can
be directly connected to the input of the save-as-midi
function. Evaluating this brings up a dialog box where you can choose where to
save a MIDI file of the output. That file can then be transferred to other
programs, or reopened in OM by using a Midifile object. The output from
this Maquette might look like this (it will
change because of the random elements):
| Prev | Home | Next |
|---|---|---|
| The Maquette II | Up | Tutorial 41 |